Your Guide to Van Upholstery Tips
- Van Seats Ltd
- Jan 27
- 5 min read
When it comes to upgrading your van, one of the most impactful changes you can make is to the seats. Whether you’re converting a campervan, outfitting a commercial vehicle, or simply refreshing your ride, quality seating can transform your experience. I’ve spent a lot of time exploring the best ways to enhance van interiors, and I’m excited to share practical advice and insider tips to help you get the most from your van upholstery project.
From choosing the right materials to understanding the installation process, this guide covers everything you need to know. Let’s dive in and make your van seats comfortable, stylish, and built to last.
Why Van Upholstery Tips Matter
Upgrading your van seats is more than just a cosmetic change. It’s about comfort, durability, and functionality. When you spend hours on the road, your seats need to support you properly and withstand daily wear and tear. Plus, the right upholstery can add a personal touch that reflects your style or brand.
Here are some key reasons why paying attention to van upholstery tips is essential:
Comfort: Good padding and supportive materials reduce fatigue on long drives.
Durability: Tough fabrics and quality stitching stand up to spills, dirt, and heavy use.
Style: Custom colours and textures can match your van’s interior theme.
Value: Well-maintained seats increase resale value and appeal.
Functionality: Features like waterproofing or stain resistance make maintenance easier.
When you understand these factors, you can make smarter choices that save money and improve your daily experience.

Essential Van Upholstery Tips for Every Project
Whether you’re a DIY enthusiast or working with a professional, these tips will help you get the best results:
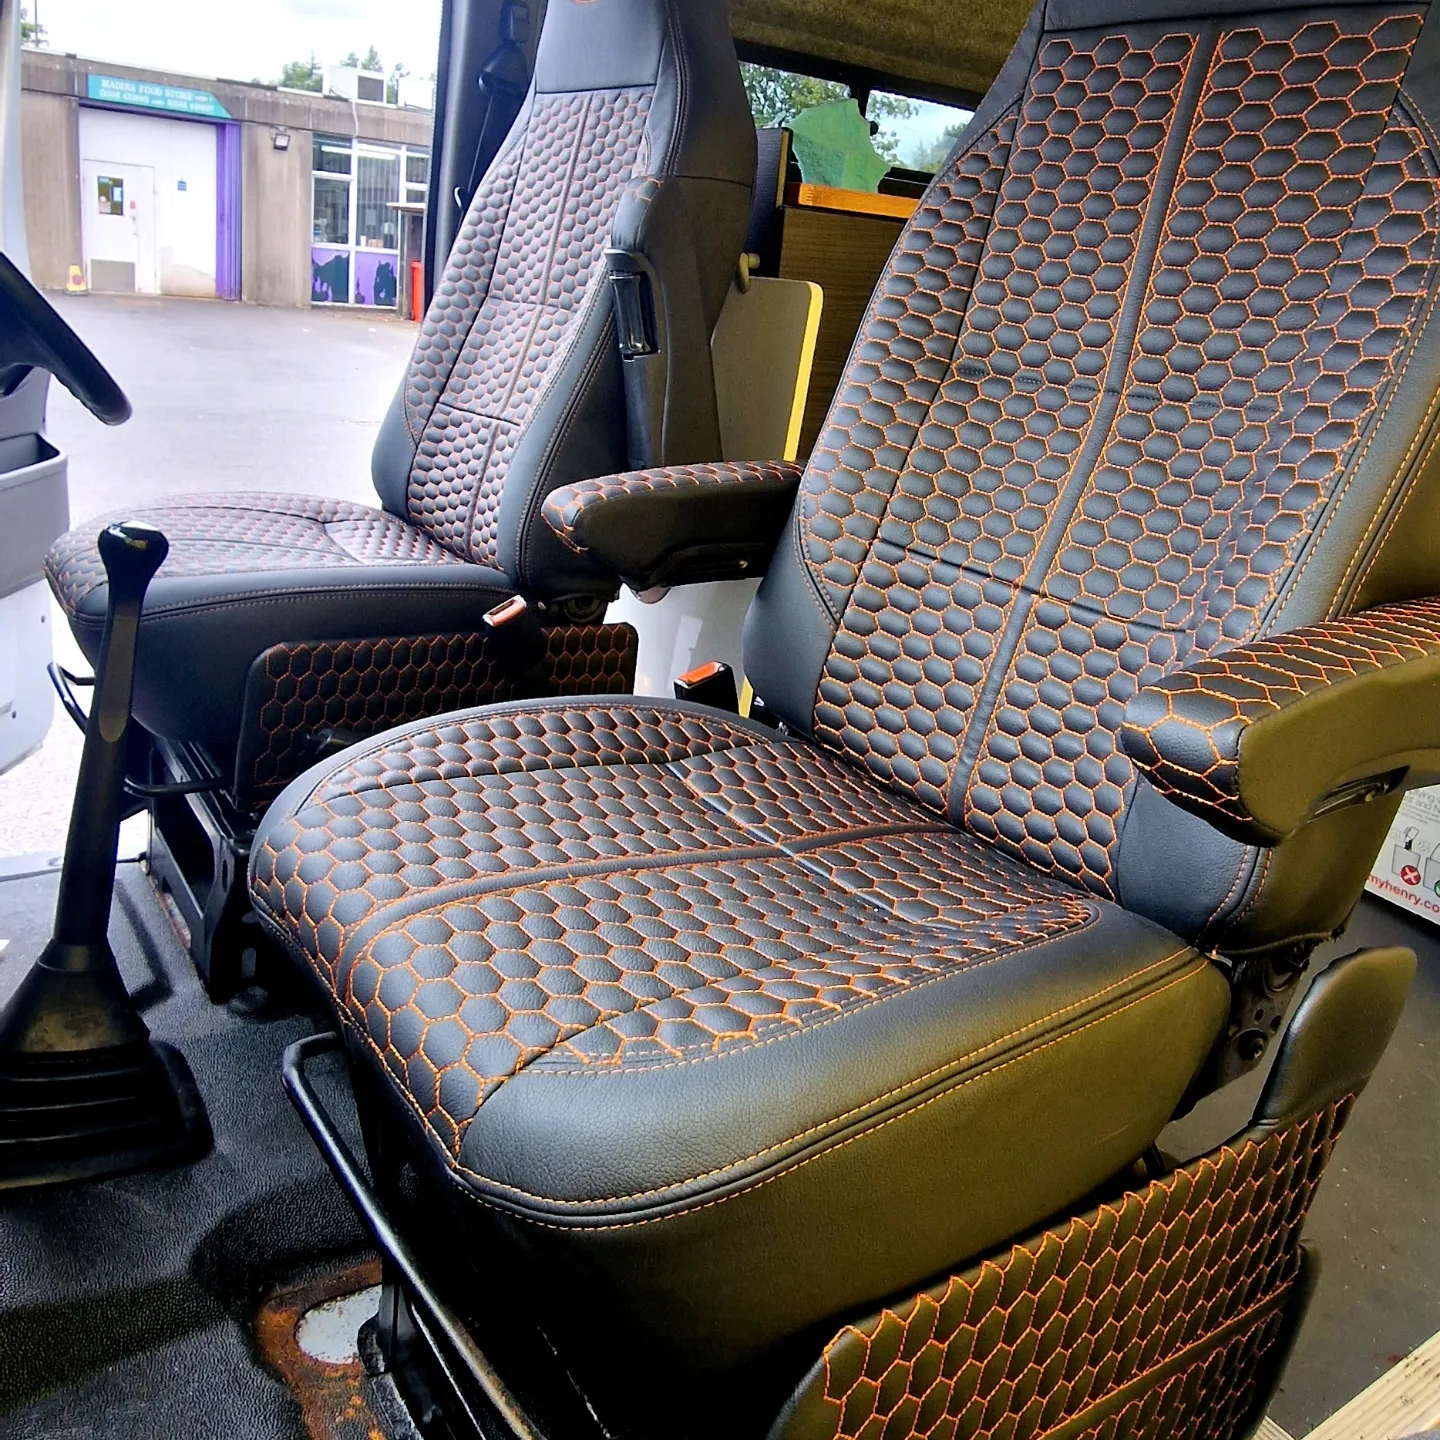
1. Choose the Right Material
The material you select affects comfort, durability, and maintenance. Here are some popular options:
Leather: Luxurious and easy to clean but can be expensive and hot in summer.
Vinyl: Affordable and waterproof, ideal for commercial vans or pets.
Fabric: Breathable and comfortable but may stain more easily.
Neoprene: Waterproof and durable, great for outdoor adventures.
Think about how you use your van. For example, if you’re a pet groomer or run a mobile clinic, waterproof and easy-to-clean materials are a must.
2. Prioritise Comfort and Support
Look for seats with good padding and ergonomic design. Adjustable lumbar support and headrests can make a big difference on long trips. Don’t forget to consider seat height and width to fit your body and driving style.
3. Plan for Maintenance
Choose materials and colours that hide dirt and stains well. Darker colours or patterned fabrics can be practical for high-traffic vehicles. Also, consider adding removable covers for easy washing.
4. Match Your Van’s Interior
Your seats should complement the overall look of your van. Think about colour schemes, textures, and finishes. A cohesive interior feels more inviting and professional.
5. Work with Trusted Suppliers
If you’re ordering custom seats or upholstery kits, choose suppliers with good reputations and clear warranties. Quality craftsmanship ensures your investment lasts.
Can I reupholster my car seats myself?
Absolutely! Reupholstering your van seats yourself can be a rewarding project if you have the right tools and patience. Here’s what you need to know before you start:
Tools and Materials
Upholstery fabric or leather
Foam padding (if replacing)
Staple gun and staples
Screwdrivers and pliers
Scissors and fabric glue
Sewing machine (optional for complex stitching)
Step-by-Step Process
Remove the seats: Carefully unbolt your seats from the van floor.
Strip old upholstery: Remove staples and fabric, noting how the original cover fits.
Inspect and replace padding: If the foam is worn, replace it for better comfort.
Cut new fabric: Use old covers as templates to cut your new material.
Attach new upholstery: Stretch the fabric tightly and staple it securely.
Reinstall seats: Bolt the seats back into place and test for comfort.
Tips for Success
Take photos during disassembly to guide reassembly.
Work in a clean, well-lit space.
Don’t rush – tight, smooth fabric looks best.
If sewing is needed, practice on scraps first.
DIY reupholstery saves money and lets you customise your van seats exactly how you want. But if you’re unsure, professional help is always available.

How to Choose the Best Upholstery for Different Van Uses
Your van’s purpose influences the best upholstery choice. Here’s a quick guide for common uses:
Campervans and Leisure Vans
Prioritise comfort and style.
Use breathable fabrics or leather for a cosy feel.
Consider stain-resistant treatments for food and drink spills.
Add cushions or removable covers for extra comfort.
Commercial and Fleet Vehicles
Focus on durability and easy cleaning.
Vinyl or neoprene are excellent choices.
Dark colours hide dirt and wear.
Waterproof materials protect against spills and grime.
Mobile Offices and Digital Nomads
Choose ergonomic seats with good lumbar support.
Use materials that balance comfort and professionalism.
Consider integrated features like swivel bases or fold-out desks.
Pet Grooming and Mobile Clinics
Waterproof, wipe-clean fabrics are essential.
Use antimicrobial or stain-resistant materials.
Easy-to-remove covers help maintain hygiene.
By matching upholstery to your van’s function, you get the best performance and longevity.
Upgrading Your Van Seats: What to Expect from Professionals
If you decide to work with a specialist, here’s what the process usually looks like:
Consultation: Discuss your needs, budget, and style preferences.
Material selection: Choose from a range of fabrics, leathers, and finishes.
Custom design: Tailored seats to fit your van’s layout and your comfort.
Installation: Professional fitting ensures safety and quality.
Aftercare advice: Tips on cleaning and maintenance to keep seats looking great.
Professional services often include warranties and guarantees, giving peace of mind. Plus, they can handle complex jobs like heated seats or integrated electronics.
If you want to explore premium options, check out van seat upholstery specialists who offer a full range of products and tailored services.
Making Your Van Seats Last Longer
Once your seats are upgraded, keeping them in top shape is key. Here are some simple maintenance tips:
Regular cleaning: Vacuum and wipe down seats weekly.
Use protectors: Seat covers or mats protect against spills and wear.
Avoid harsh chemicals: Use upholstery cleaners designed for your material.
Address damage quickly: Repair tears or loose stitching before they worsen.
Keep pets secure: Use pet seat belts or carriers to prevent scratches.
With a little care, your van seats will stay comfortable and attractive for years.
Upgrading your van seats is a smart investment that pays off in comfort, style, and value. Whether you tackle the project yourself or work with experts, these van upholstery tips will guide you to the best results. Ready to transform your van’s interior? Start planning your seat upgrade today and enjoy every journey in comfort and style.
Comments